Intro
Welcome to Part 5 of the NSX-T AVI/ALB Lab and Part 3 of the vCenter AVI/ALB Lab
In the NSX-T previous post, we covered the creation of the Overlay Segments for the Avi SE Management and VIPs.
In the vCenter previous post, we covered the configuration of permissions in vCenter.
In this post we’ll cover the deployment of the Avi Controller OVA, this is nothing special so you can skip this post if you are comfortable with deploying OVA’s and it’s the same process for both labs.
Currently to get access to the Avi Controller OVA you will need a customer account on the Avi Portal the software is not currently available via the VMware website.
The Build
We are finally ready to deploy the Avi Controller, technically speaking we could have deployed the controller before completing any of the previous steps but we then wouldn’t be able to configure it.
Connect to your vCenter and go to the Cluster where the Controller will reside. Right click and select Deploy OVF Template

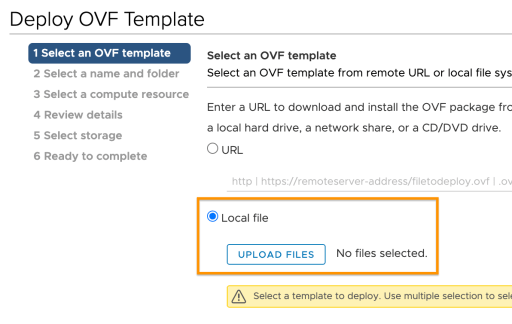
Select Local file the click UPLOAD FILES

Browse and select the OVA file then click NEXT
Give the VM a name and select the location/folder to place it in then click NEXT

Select the Cluster/Host to deploy the VM then click NEXT

Review the details and click NEXT

Select the datastore and for production deployments select Thick Provision Lazy Zeroed disk format then click NEXT

Select the Management Network and click NEXT

Enter the Management IP address, the Subnet Mask and the Default Gateway these can be left blank if you are using DHCP but it is recommended to use a static IP. Sysadmin login authentication key can be left blank it is used to specify an SSH public key and is needed for AWS deployments.
Click NEXT

Review the details and click FINISH

For a production deployment we would first create a content library on the management cluster and upload the controller ova which we can then use to deploy the Avi controllers as we would need three. Once they are up and we have configured the first one we assign a cluster IP and then connect the two remaining controllers. I’ll cover that in a different blog post, for the purpose of this lab I only need 1 controller so we are good to go.
The next step is to perform the initial Controller configuration.
AVI/ALB NSX-T Lab
AVI/ALB NSX-T Lab Part 6: – Controller Setup NSX-T Cloud
AVI/ALB vCenter Lab
AVI/ALB vCenter Lab Part 4: –
